进阶用法
1. 全局代理/规则代理/虚拟网卡模式(tun模式)的区别
系统代理-规则:
根据规则判断是否走代理,例如baidu.com不走代理,google.com走代理系统代理-全局:
都走代理(但不包括命令行),例如baidu.com、google.com都走代理虚拟网卡模式(tun模式):
整个操作系统都走代理,包括命令行。
2. 命令行中使用代理
- Windows-CMD
shell
# 设置代理
set http_proxy=http://127.0.0.1:7897
set https_proxy=http://127.0.0.1:7897
# 测试代理
curl https://www.google.com
git clone https://github.com/xxx/xxx.git- Windows-PowerShell
shell
# 设置代理
$env:http_proxy="http://127.0.0.1:7897"
$env:https_proxy="http://127.0.0.1:7897"
# 测试代理
curl https://www.google.com
git clone https://github.com/xxx/xxx.git- Linux
- 需要打开“设置-局域网连接”;
- 以下的192.168.1.100这个地址替换为你自己本机的IP地址,且需要在同个一局域网环境下。
shell
# 1. 临时使用,仅当前行有效
http_proxy=http://192.168.1.100:7897 https_proxy=http://192.168.1.100:7897 curl https://www.google.com

# 2. 临时使用,仅当前会话有效,关闭终端后失效(常用)
export http_proxy=http://192.168.1.100:7897
export https_proxy=http://192.168.1.100:7897
# 验证
curl https://www.google.com

# 3. 永久使用(不推荐)
echo "export http_proxy=http://192.168.1.100:7897" >> /etc/profile
echo "export https_proxy=http://192.168.1.100:7897" >> /etc/profile
source /etc/profile
# 验证
curl https://www.google.com
3. docker中使用代理
shell
# /etc/docker/daemon.json中配置以下内容:
{
  "proxies": {
        "http-proxy": "http://192.168.1.100:7897",
        "https-proxy": "http://192.168.1.100:7897"
    }
}
# 重启docker服务
systemctl daemon-reload
systemctl restart docker
# 验证
docker pull nginx
4. Docker Desktop中使用代理
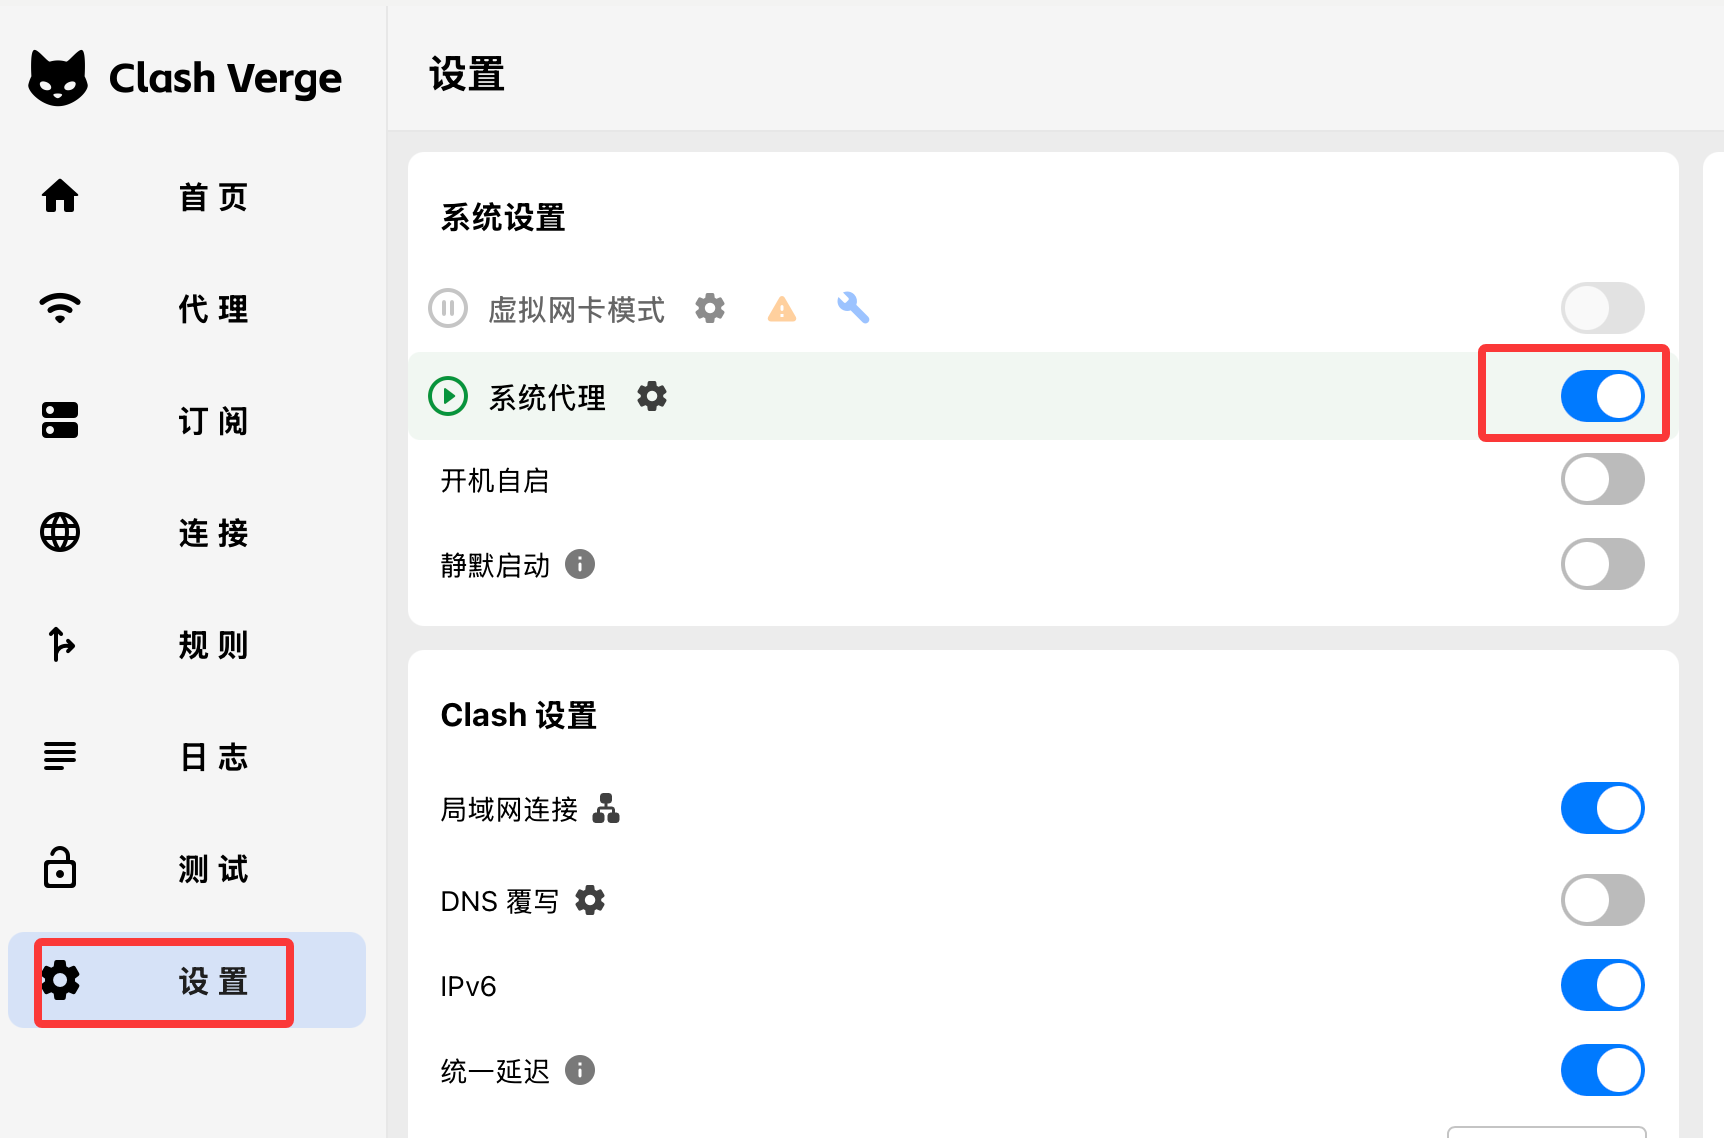
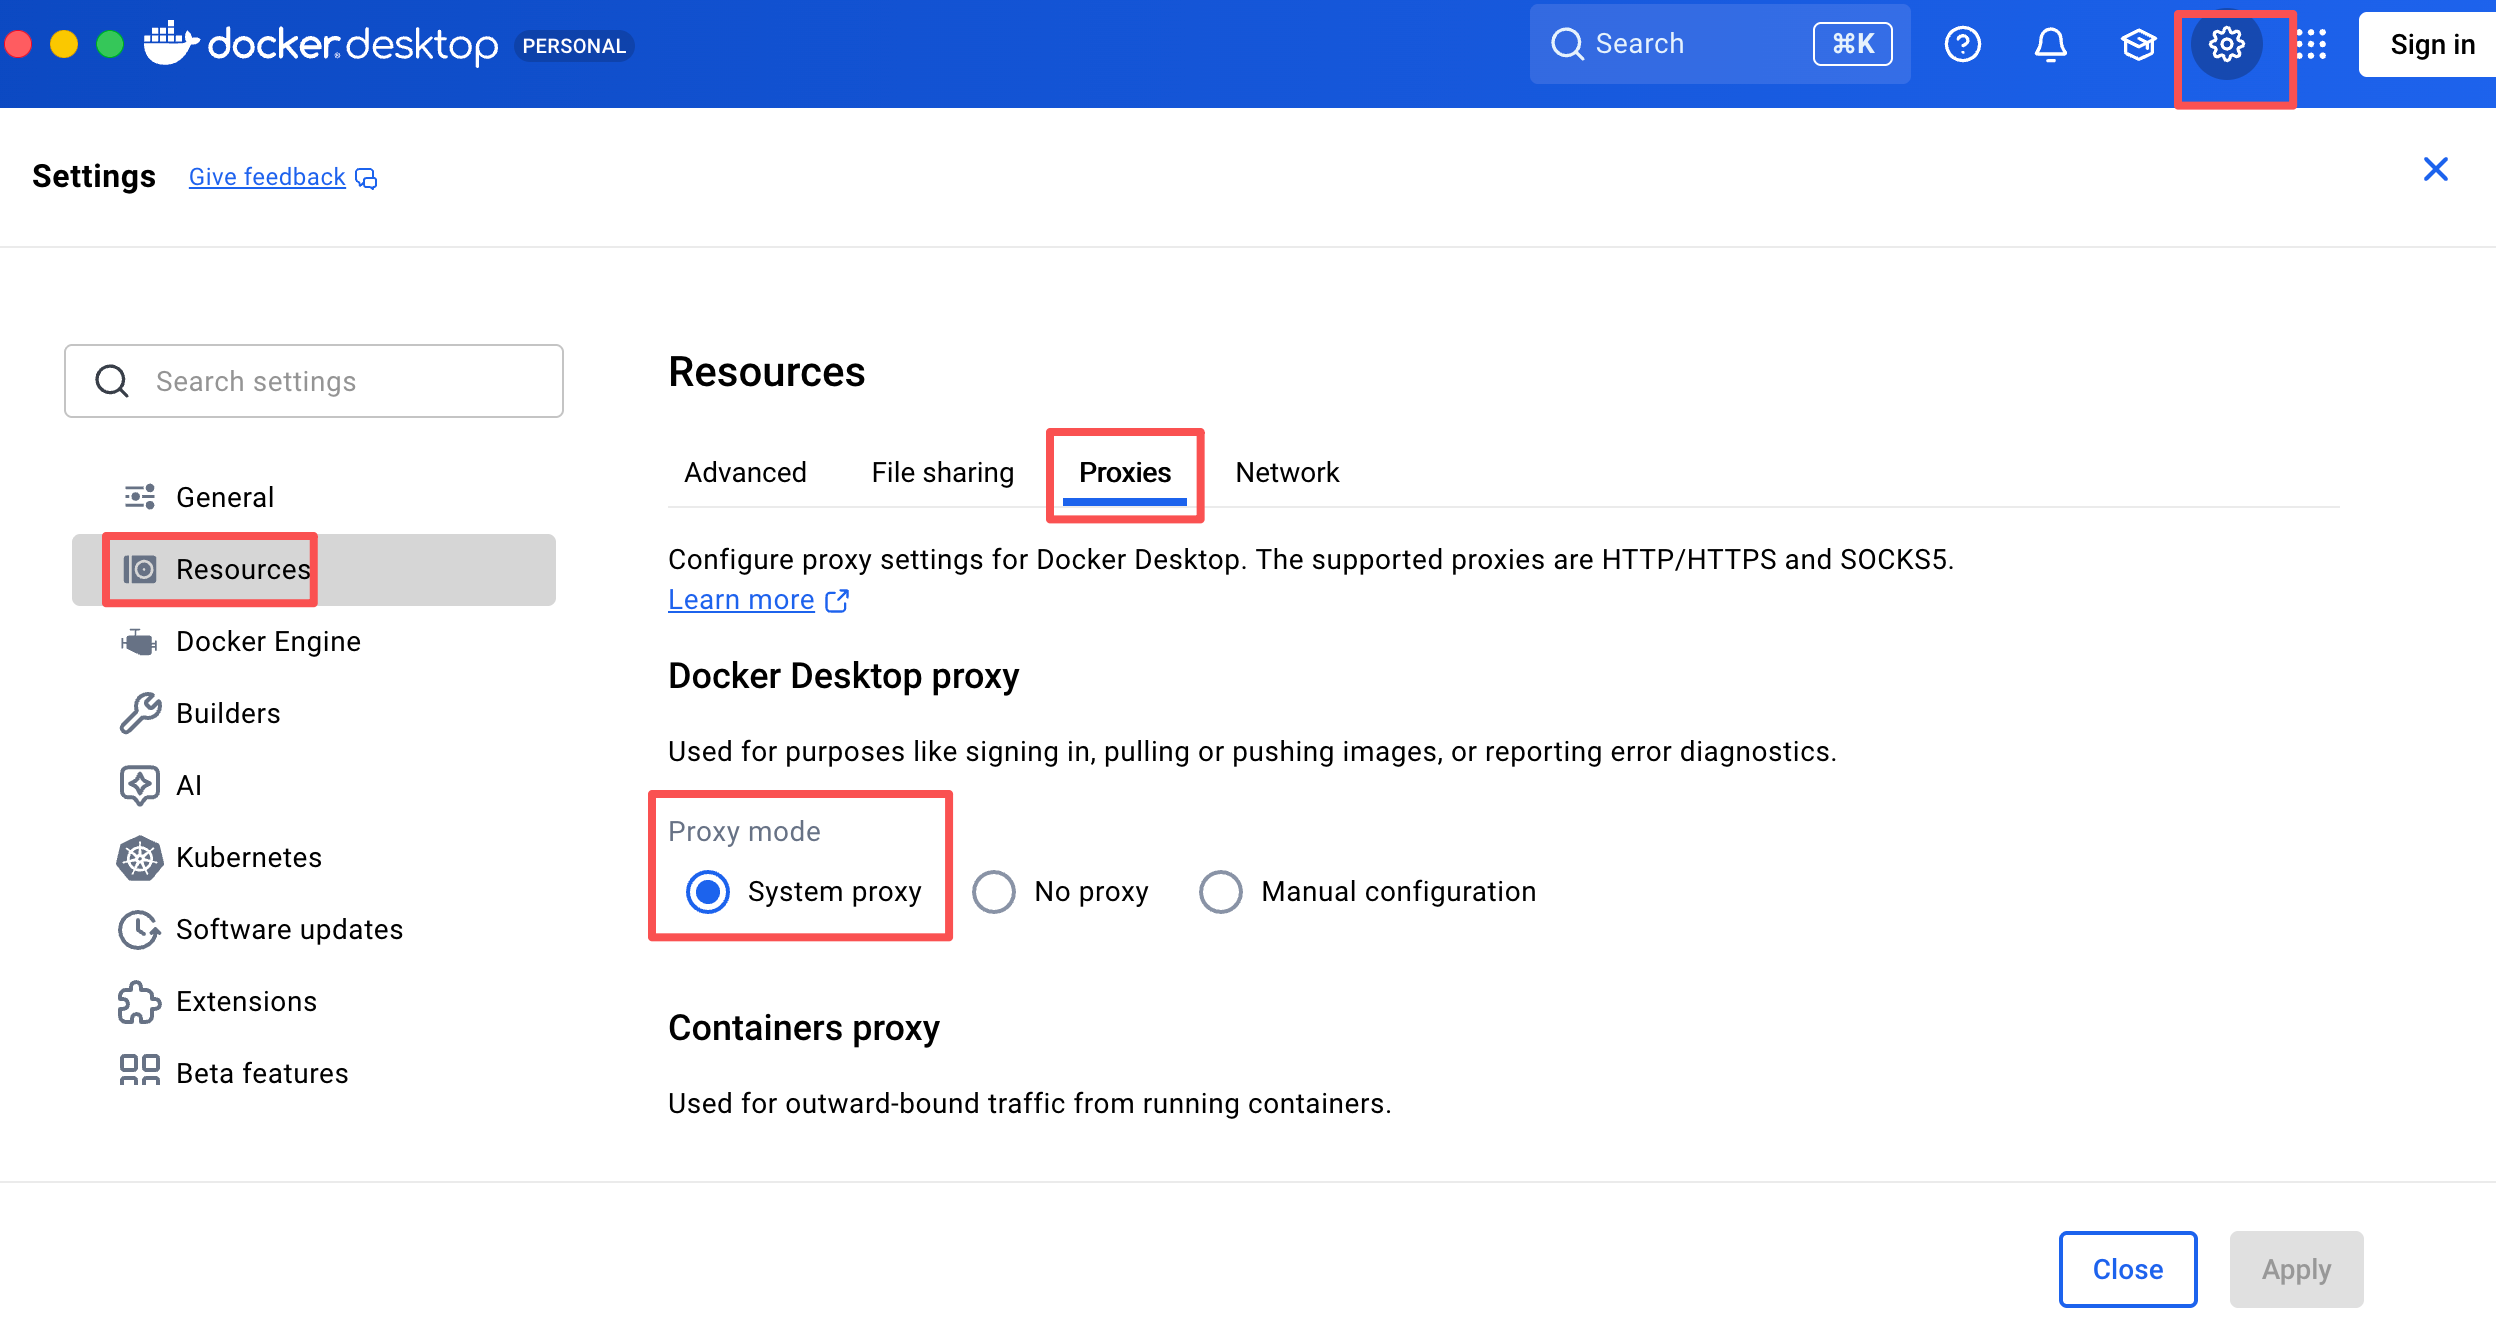
4.1 对于最新版Docker Desktop的设置方法:
(1)在C*l*a*s*h verge中,打开设置->系统代理;
(2)在Docker Desktop中,打开设置页面中Resource->Proxies->System proxy。
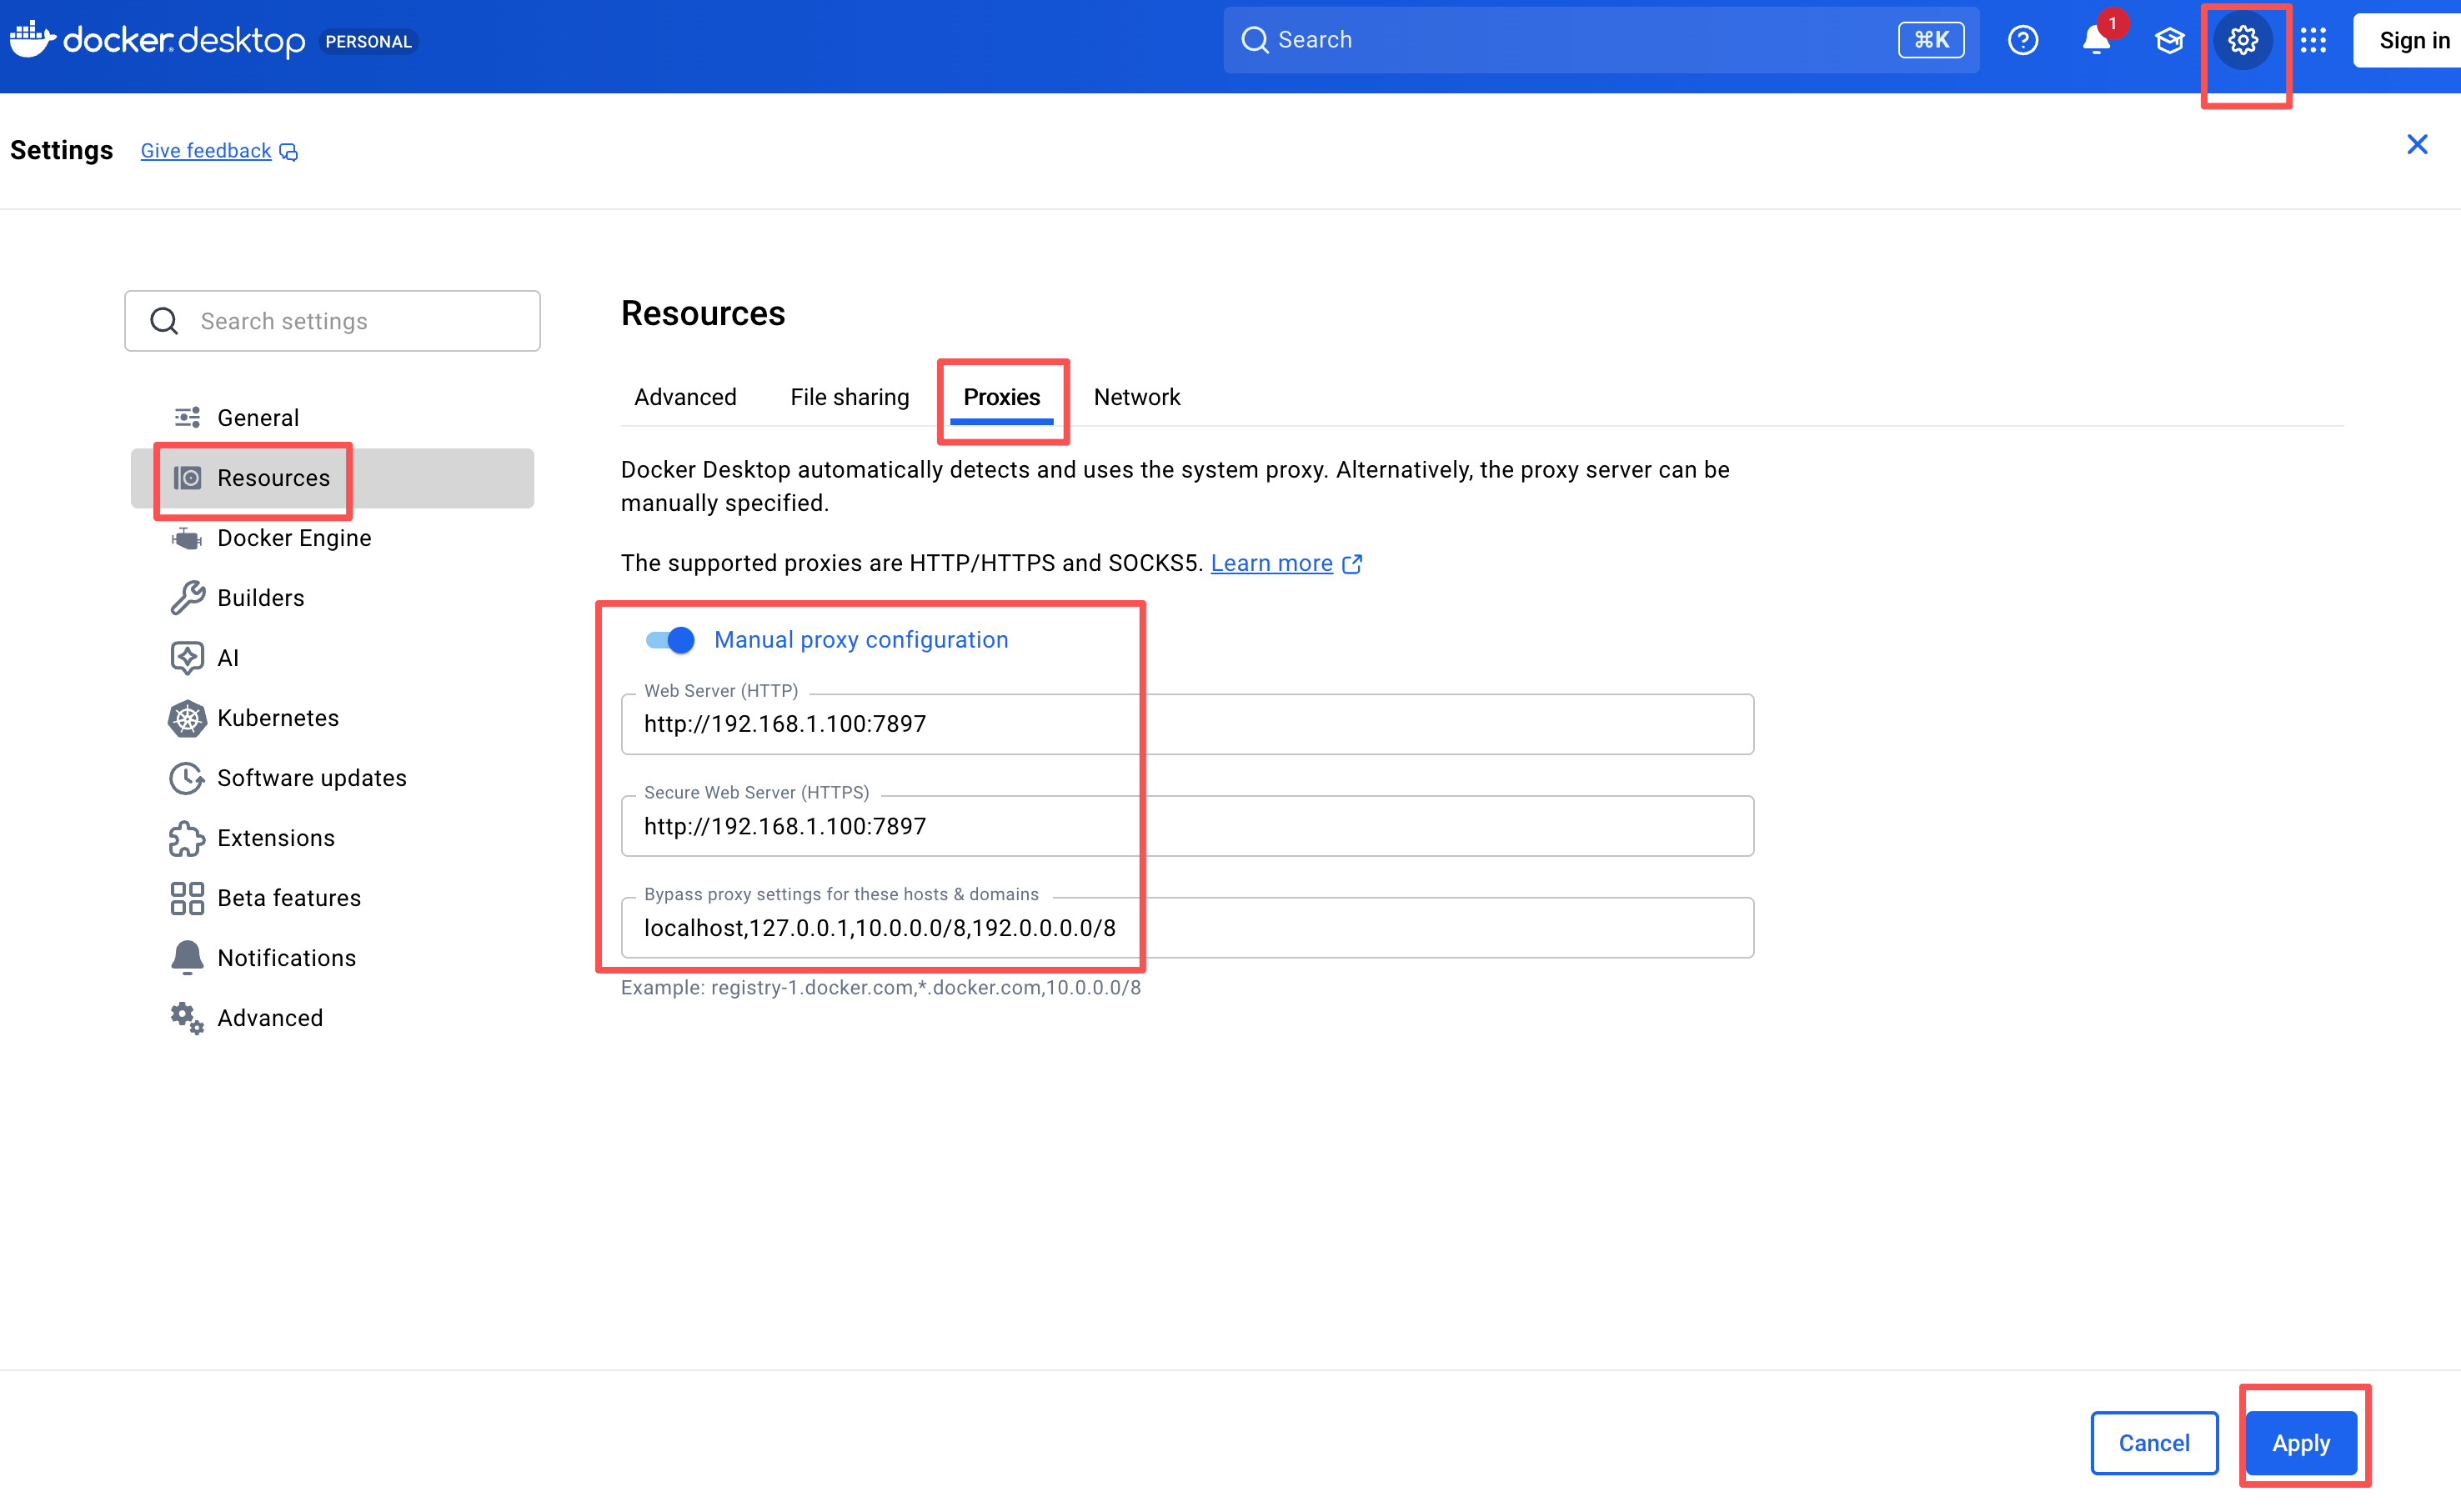
4.2 对于老版本Docker Desktop的设置方法:
点击“右上角设置->Resourse->Proxies”, 输入配置信息, 并点击“Apply”按钮保存设置,并重启Docker Desktop。